
General Description
An advantage of using a powerful industrial router is the ability to send and receive data securely over an encrypted connection. This offers a user the ability to keep data secure between two endpoints by allowing the connected equipment to send data across an encrypted network connection securely without any changes to the configuration of the equipment using well defined security protocols. This document explains how to connect the Siretta router family to a server over an IPSec VPN tunnel.
The Siretta range of Industrial Routers support the followings VPN protocols:
- GRE
- OpenVPN Client
- L2TP/PPTP Client
- IPSec
Before you start the process of establishing an IPSec VPN connection between a Siretta router and a server, please obtain the following details:
- VPN Server IP address
- A pre-shared key, user name and password
These details are available from your network administrator for your VPN server.
NOTE: If you do not have your VPN Server details to hand then you can obtain temporary test details from the following link ‘http://www.vpngate.net/en/‘ to allow you to check the VPN functionality of the router.
VPN Server Details
The example shown below uses a set of temporary details, when opening this link on your web browser you will be presented with the following:
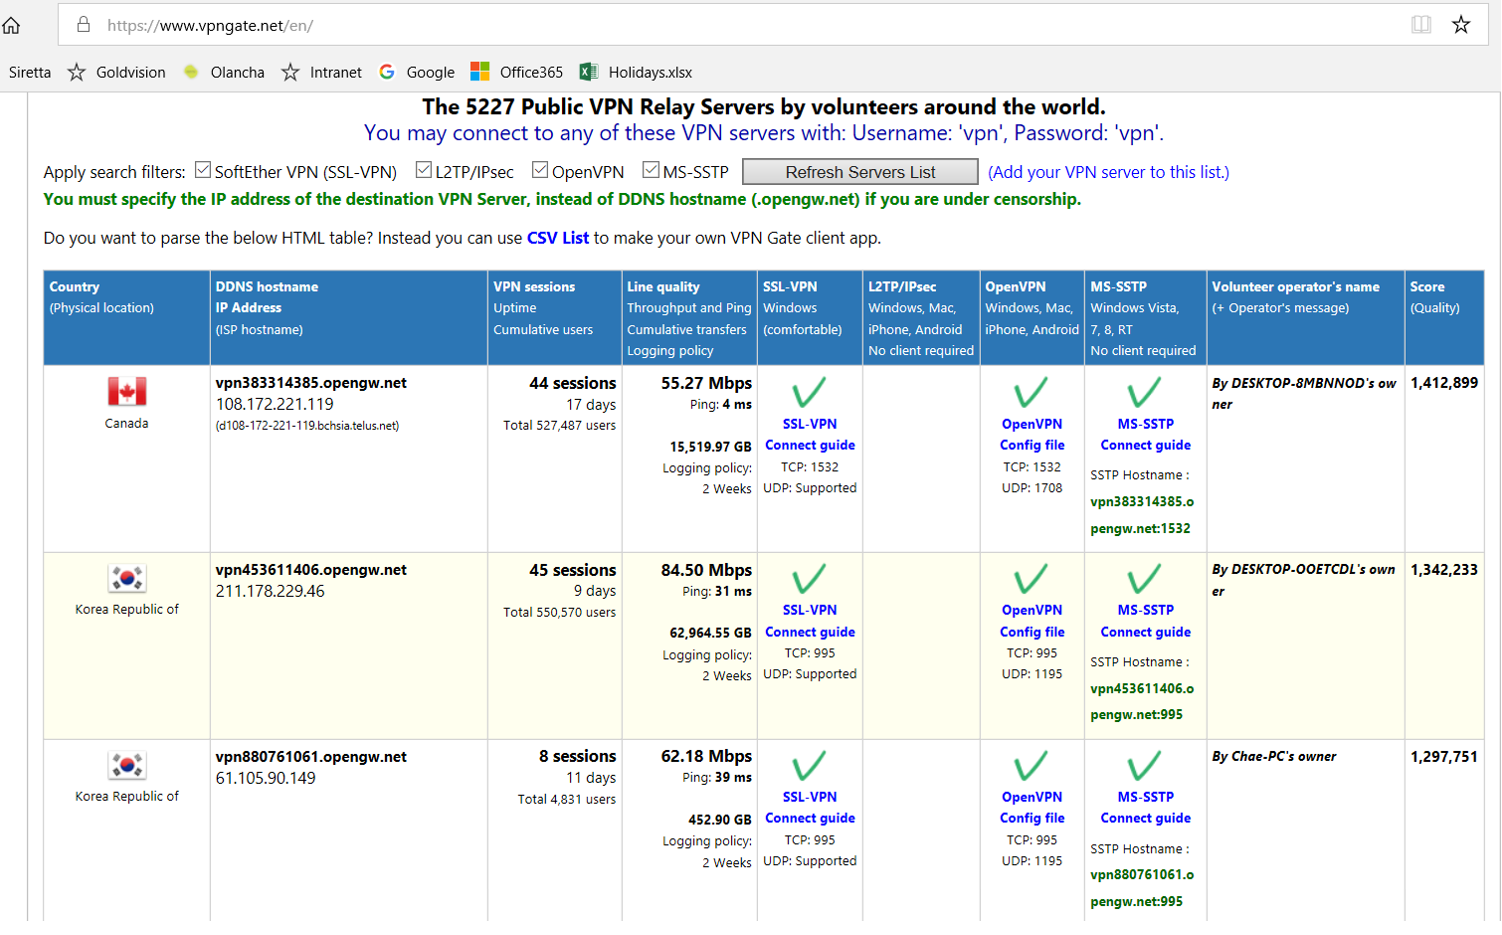
1) Check the L2TP/IPsec box then click Refresh server list. The IPsec servers list will appear as shown below:
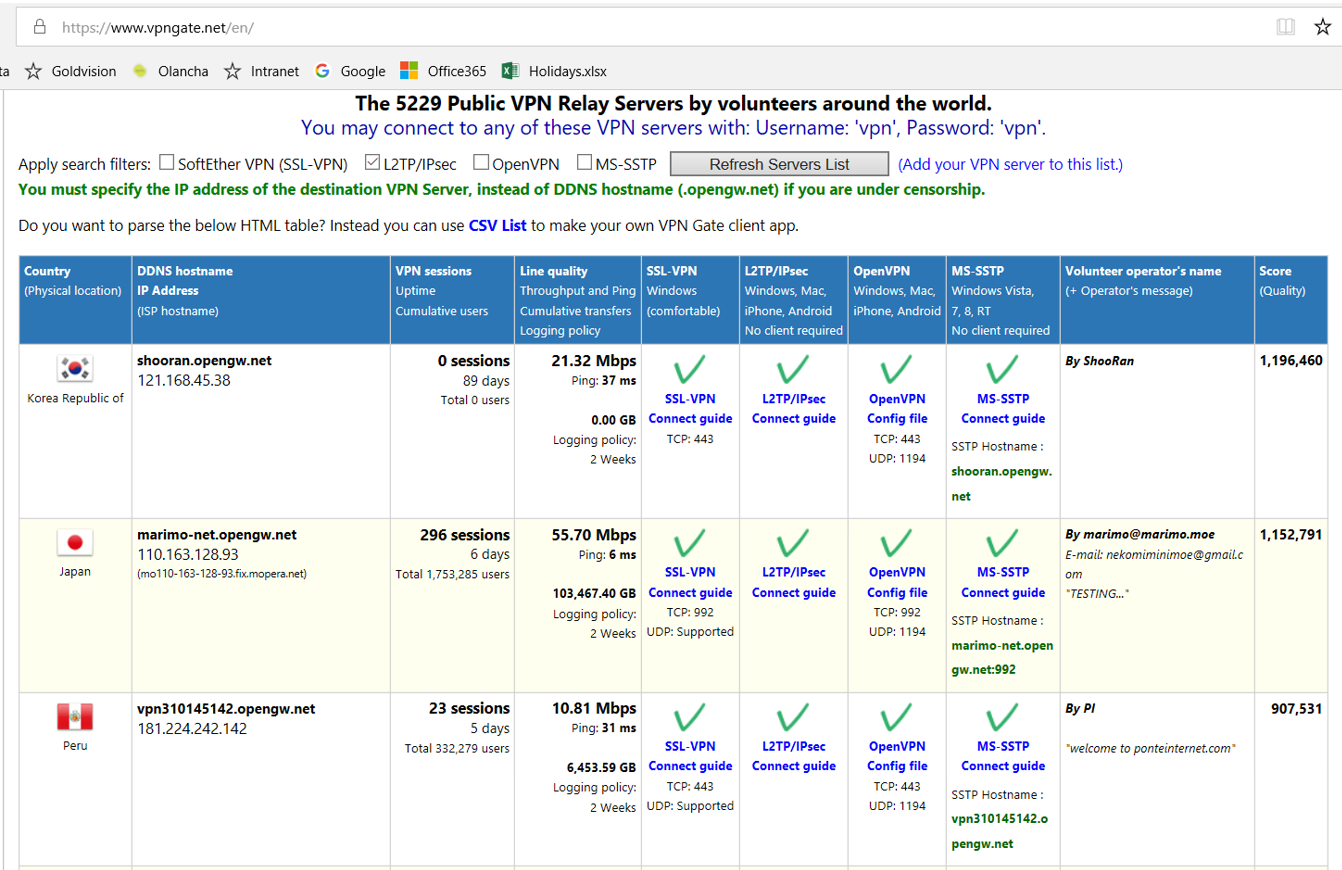
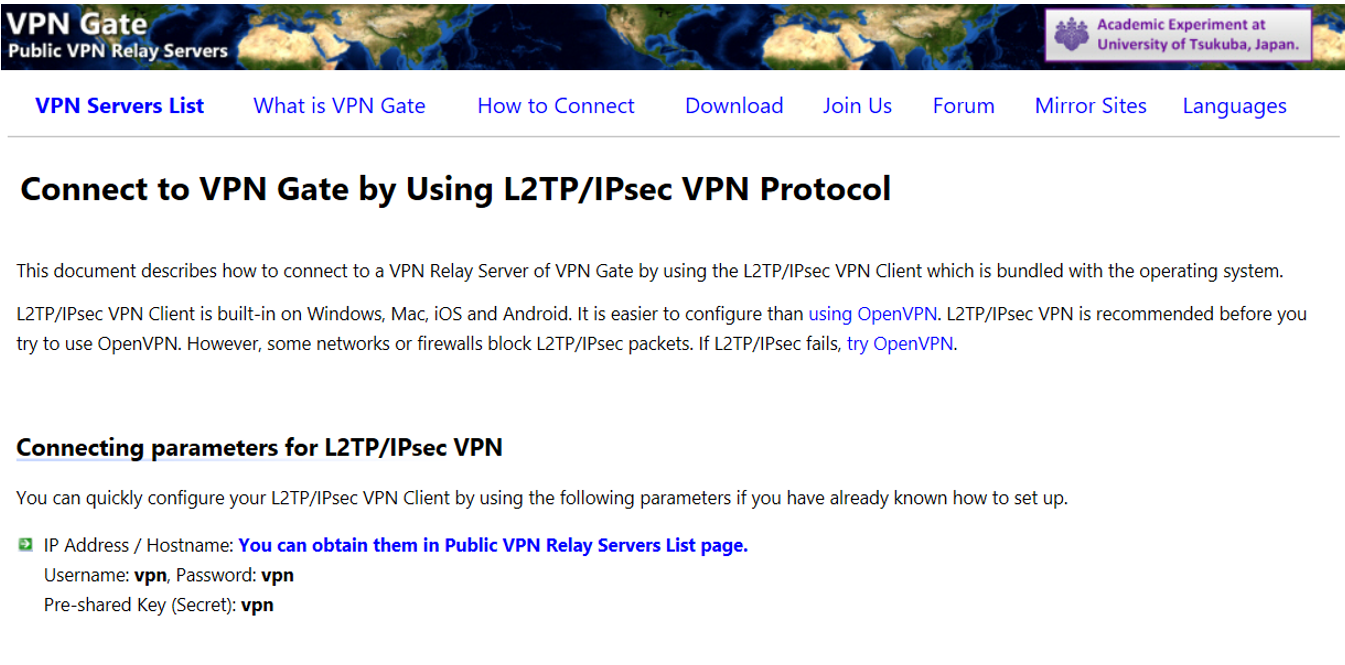
2) Select and click your choice of server from the list for the detailed configuration details.
Router VPN Configuration
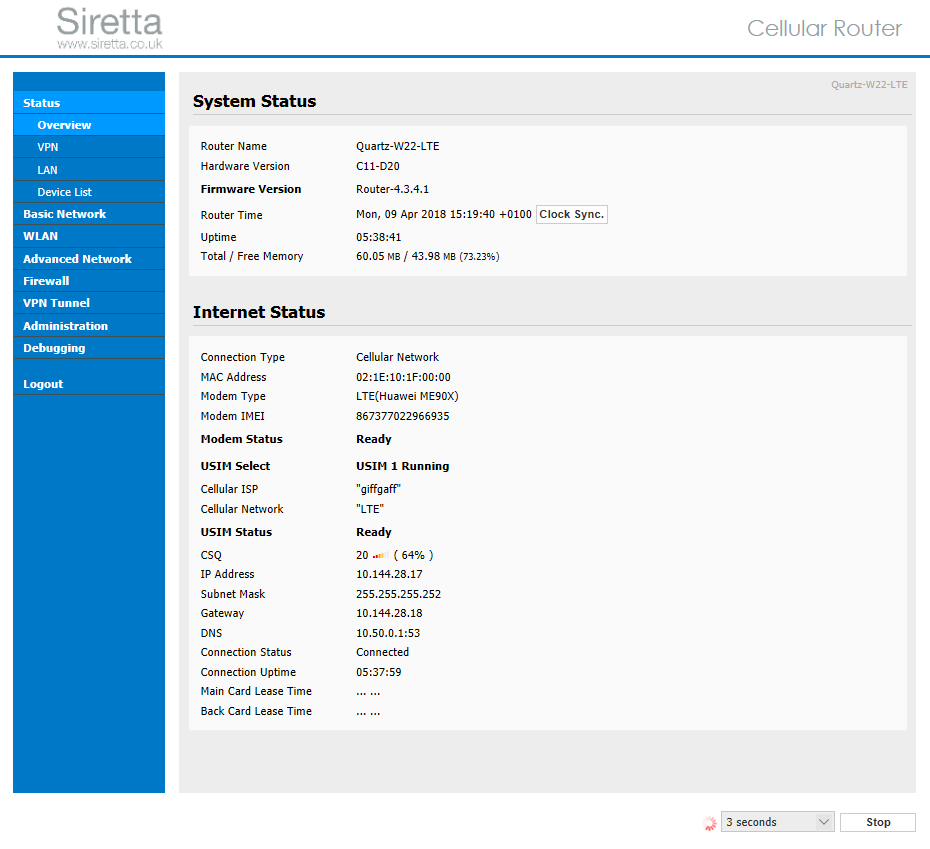
1) Make sure your Router is connected to the internet. The ‘Internet Status’ information should be similar to the image shown below:
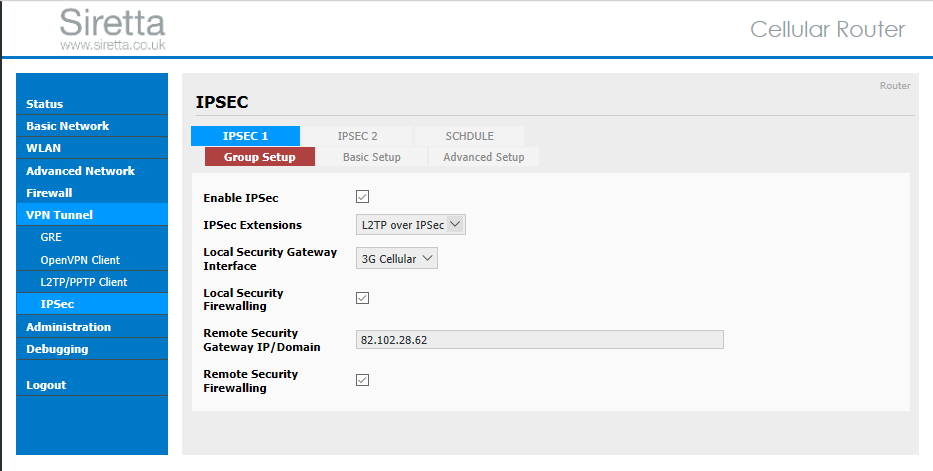
2) Select the VPN Tunnel tab on the left hand pane of the Siretta router web interface. Then select the IPSec tab and you will be presented with a number of options. On ‘Group Setup’ tab enter the following details for the Server IP address obtained from the VPN server list.
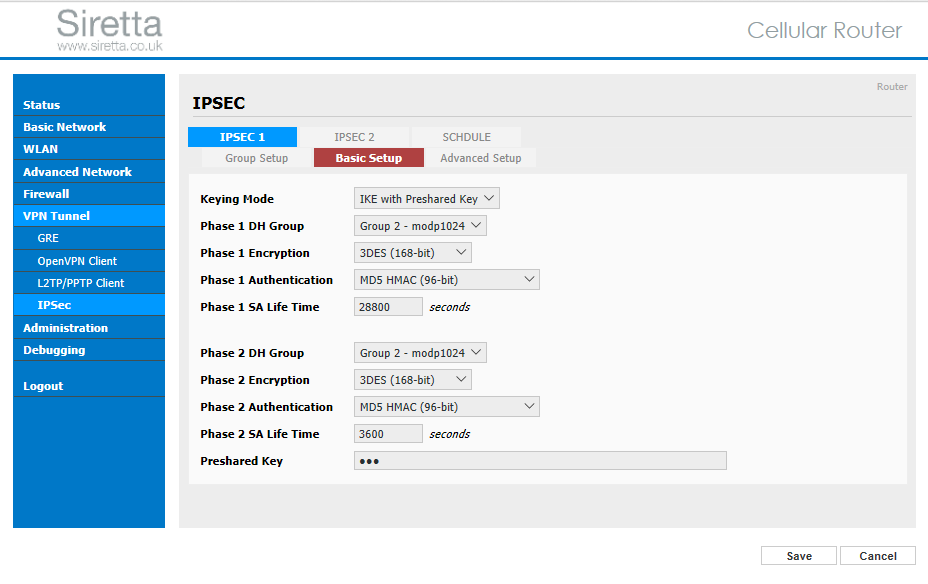
3) On ‘Basic Setup’ tab enter the Preshared Key details for VPN server obtained from the VPN server list.
4) On ‘Advanced Setup’ tab select the required options for the connection to the VPN server obtained from the VPN server list.
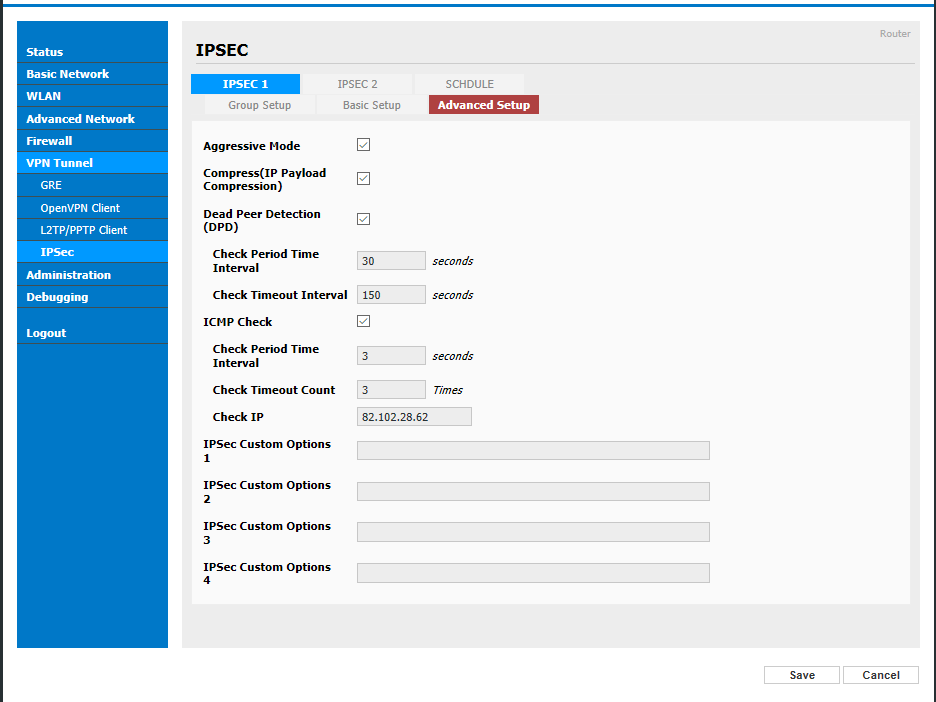
5) Click save
6) Once you have saved the VPN connection details the router will restart some of the network services and will attempt to connect to the VPN server. Click ‘Status’ on the left hand menu to view the VPN connection status and see when the VPN connection is established.
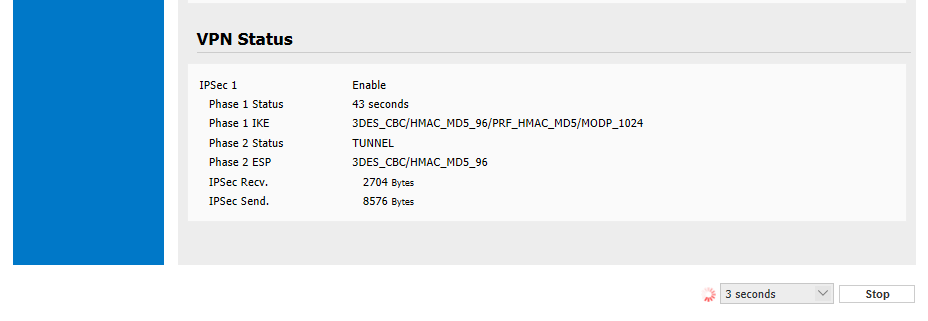
Once the VPN connection has been established between the router and the VPN server, the connected equipment will be able to directly access all of the network resources of the connected server and communicate with any devices on the server’s network.
