
GRE- stands for “Generic Routing Encapsulation”, it is a communication protocol used to establish a direct, point-to-point connection between two network nodes.
This guide shows how to Configure a GRE-Tunnel using Siretta routers. GRE-Tunnel function is available on all versions of the Siretta Routers.
The following resources were used to create this document:
- 2 x QUARTZ-W22-UMTS (EU) + ACCESSORIES
- 2xPCs each connected to a router network using a provided Ethernet cable.
- 2 x Fixed IP SIM cards
Setup Router 1 (Siretta Local office)
1. Insert SIM card into the Siretta Industrial Router (Example below uses a QUARTZ-W22-UMTS (EU)) which is for the ‘Siretta Local Office’
2. Enter the APN details as provided by the SIM card provider (You can follow the router Quick Start Guide for more assistance with this).
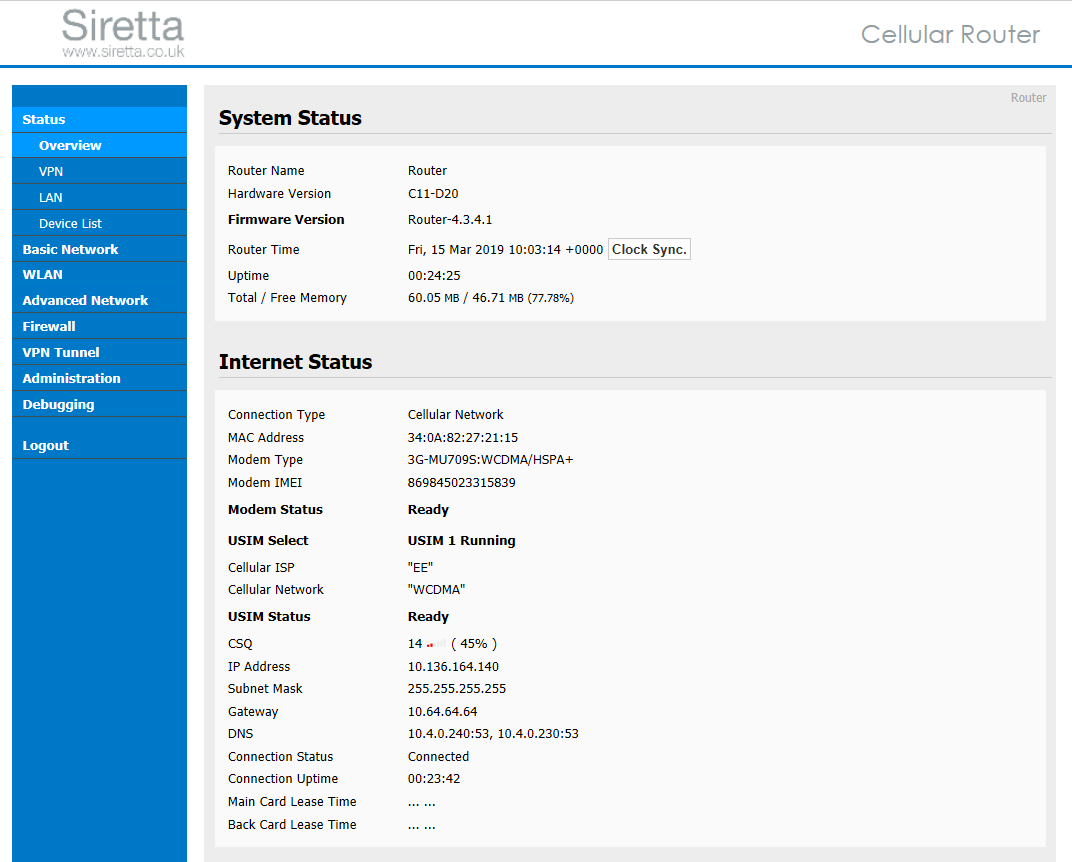
3. Once the Router is connected to the mobile network you will see the connected status on the router’s web interface (GUI) as seen below.
4. Navigate to the ‘VPN Tunnel’ tab on a router web page “GUI”.
5. Select GRE Tunnel
6. Enter the Tunnel Address
NOTE: This example uses 100.0.0.1
6. Leave tunnel Source blank.
NOTE: This will default to auto
7. Enter the Tunnel Destination
NOTE: This example uses 100.0.0.2
8. Select GRE Route
9. Enter the destination address, an example is shown below.
NOTE: This example uses the public fixed IP address of the SIM card inside the destination router ‘Siretta HQ’
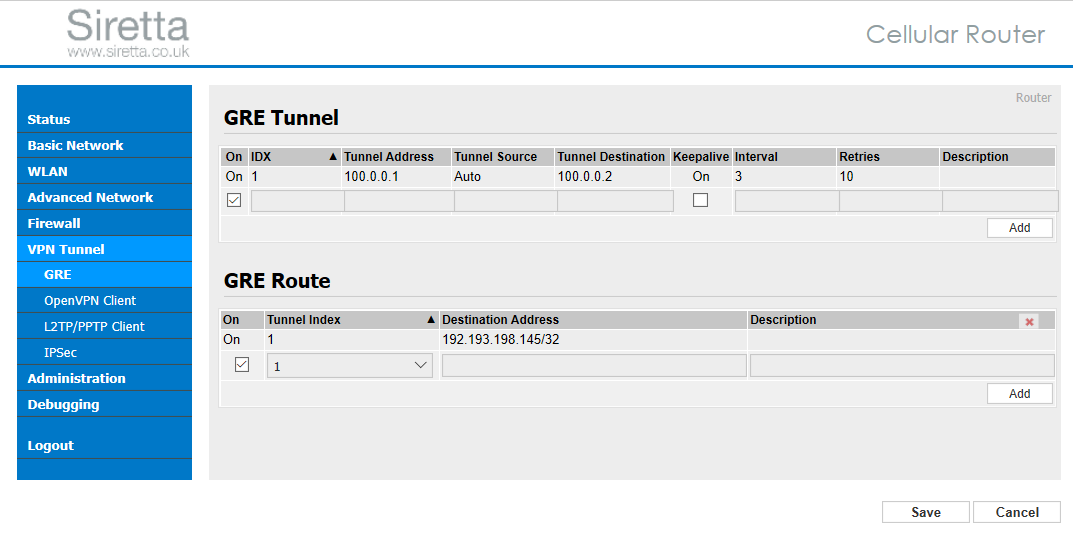
10. Click Add then Save tab for both GRE Tunnel and GRE Route.
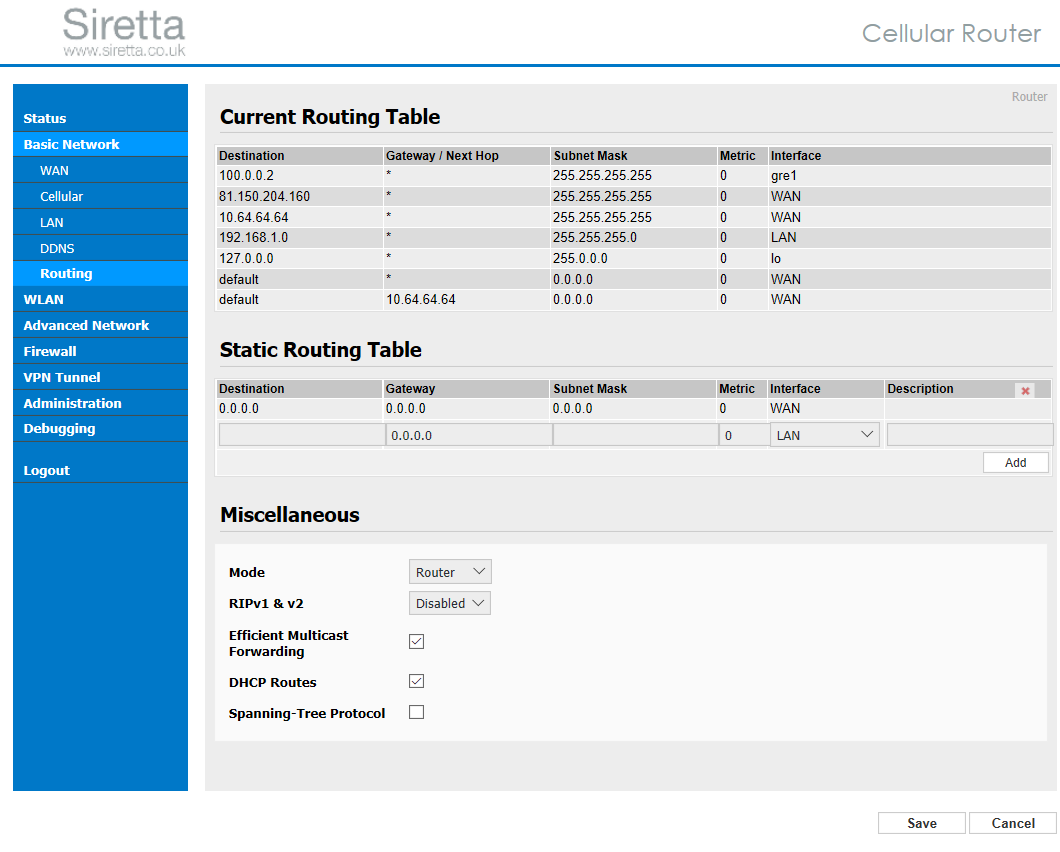
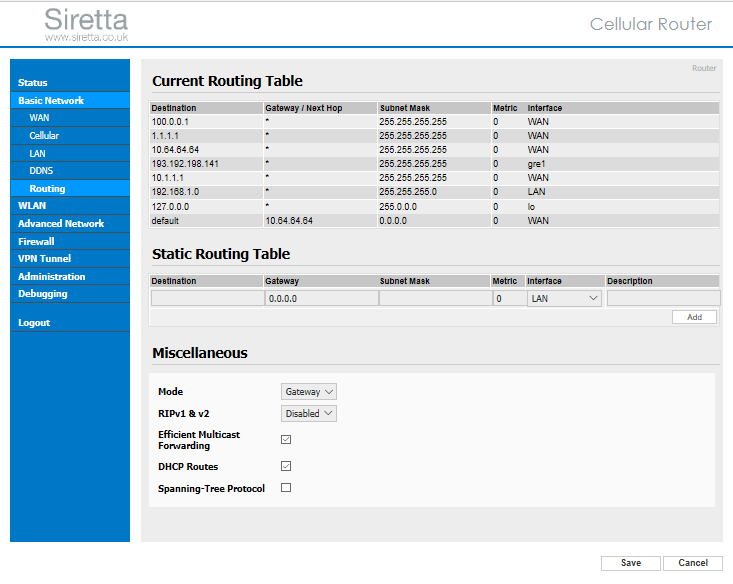
11. Navigate to the Basic Network tab on a router web page “GUI” and select Routing. You should be able to see the tunnel on the routing table as seen below.
12. Setup for ‘Siretta Local Office’ Router is complete
Setup Router 2 (Siretta HQ)
1. Insert SIM card into the Siretta Industrial Router (Example below uses a QUARTZ-W22-UMTS (EU)) which is for the ‘Siretta HQ’
2. Enter the APN details as provided by the SIM card provider (You can follow the router Quick Start Guide for more assistance with this).
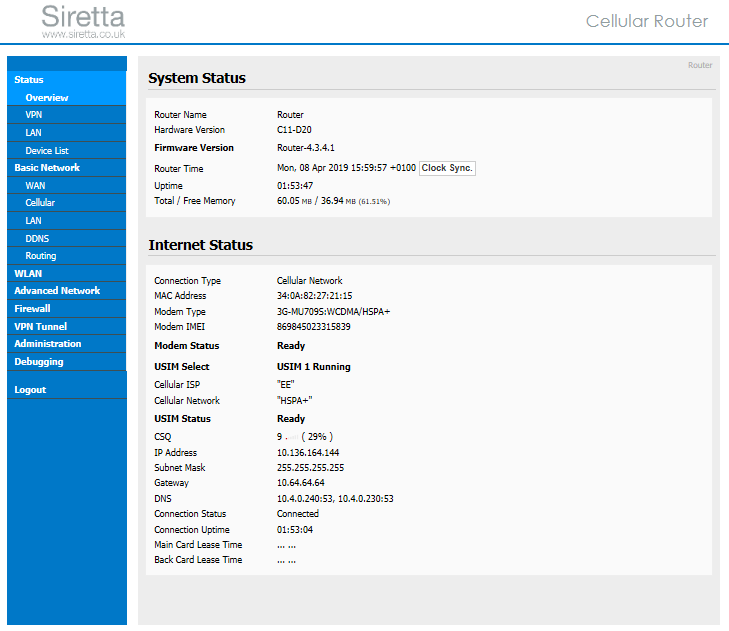
3. Once the Router is connected to the mobile network you will see the connected status on the router’s web interface (GUI) as seen below.
4. Navigate to the VPN Tunnel tab on a router web page “GUI”.
5. Select GRE Tunnel
6. Enter the Tunnel Address
NOTE: This example uses 100.0.0.2
6. Leave tunnel Source blank
NOTE: This will default to auto
7. Enter the Tunnel Destination
NOTE: This example uses 100.0.0.1
8. Select GRE Route
9. Enter the destination address, an example is shown below.
NOTE: This example uses the public fixed IP address of the SIM card inside the source router ‘Siretta Local Office’

10. Click Add then Save tab for both GRE Tunnel and GRE Route.
11. Navigate to the Basic Network tab on a router web page “GUI” and select Routing. You should be able to see the tunnel on the routing table as seen below.
12. Setup for ‘Siretta Local Office’ Router is complete
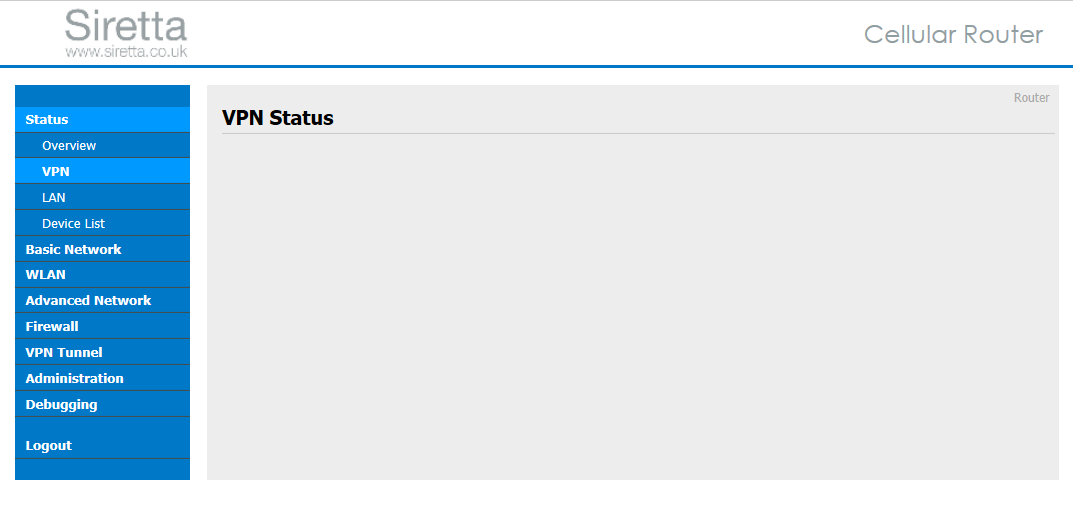
NOTE: The GRE VPN Tunnel is a virtual tunnel and its status cannot be displayed on the VPN status page.
Testing GRE Tunnel between ‘Siretta Local Office’ and ‘Siretta HQ’
This test pings each end of the GRE Tunnel as shown below.
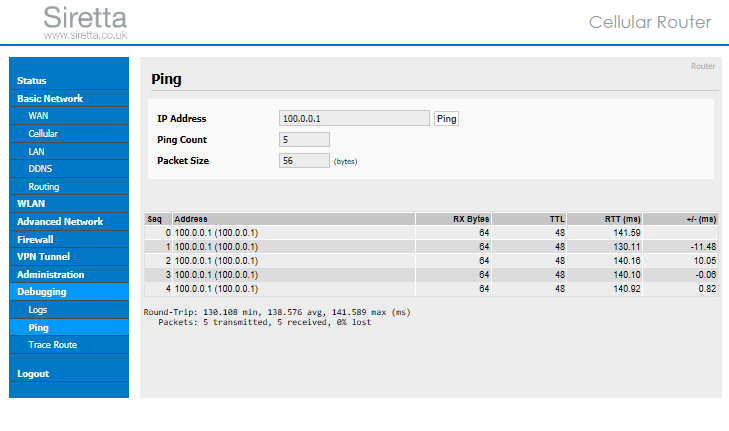
Example 1 – Send network Ping from ‘Siretta Local Office’ to ‘Siretta HQ’ using the Siretta Router’s internal ‘Debugging > Ping’ tool

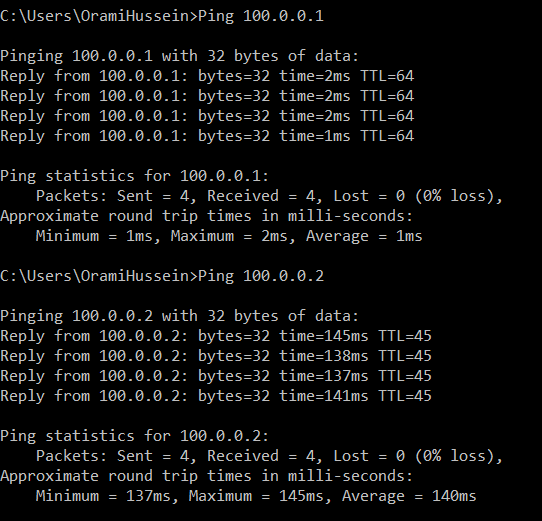
Example 2 – Send network Ping from ‘Siretta Local Office’ to ‘Siretta HQ’ using local PC CLI
Example 3 – Send network Ping from ‘Siretta HQ’ to ‘Siretta Local Office’ using the Siretta Router’s internal ‘Debugging > Ping’ tool
Example 4 – Send network Ping from ‘Siretta HQ’ to ‘Siretta Local Office’ using local PC CLI
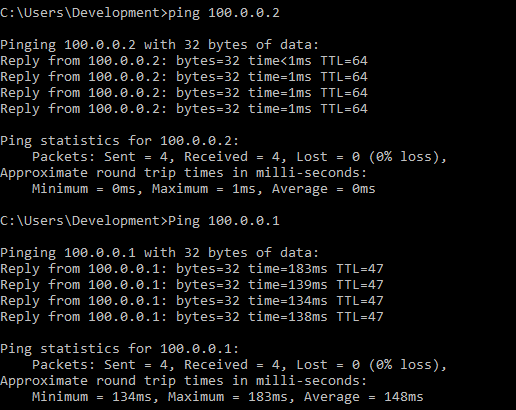
You can see from the example that the GRE VPN tunnel can be established in both directions
The full range of Siretta Industrial Router products can be found from the following link:
https://www.siretta.com/router-selector-tool/
Any queries please contact [email protected]
