
Description:
This document describes how to set up and communicate with a Siretta Industrial Modem.
The modems covered by this document are listed below:
- ZETA-xxP-LTEM (GL) – LTE Cat M & LTE NB IoT Global Industrial Modem
- ZETA-xxP-LTE1 (EU) – LTE Cat 1 European Industrial Modem
- ZETA-xxP-LTE4 (EU) – LTE Cat 4 European Industrial Modem
The topics covered by the document are listed below:
- COM Port Setup
- Commands to Check System is Working
- Commands for Basic Operation
- Cellular Network Operation
- GPRS Network Operation
- TCP Socket Connection
Requirements
- Siretta Industrial Modem
- Data enabled 2G/3G/4G/LTE Cat M SIM card for 2G/3G/4G/LTE Cat M enabled modems / data enabled LTE Cat NB IoT SIM card for LTE Cat NB IoT enabled modems
- Cellular antenna with SMA female connector
First steps
- Insert the SIM card in to the modem and attach the antenna.
- Power up the modem and wait for at least 40 seconds for the unit to power on and register to the network.
- Connect the modem to the PC serial port.
COM port setup
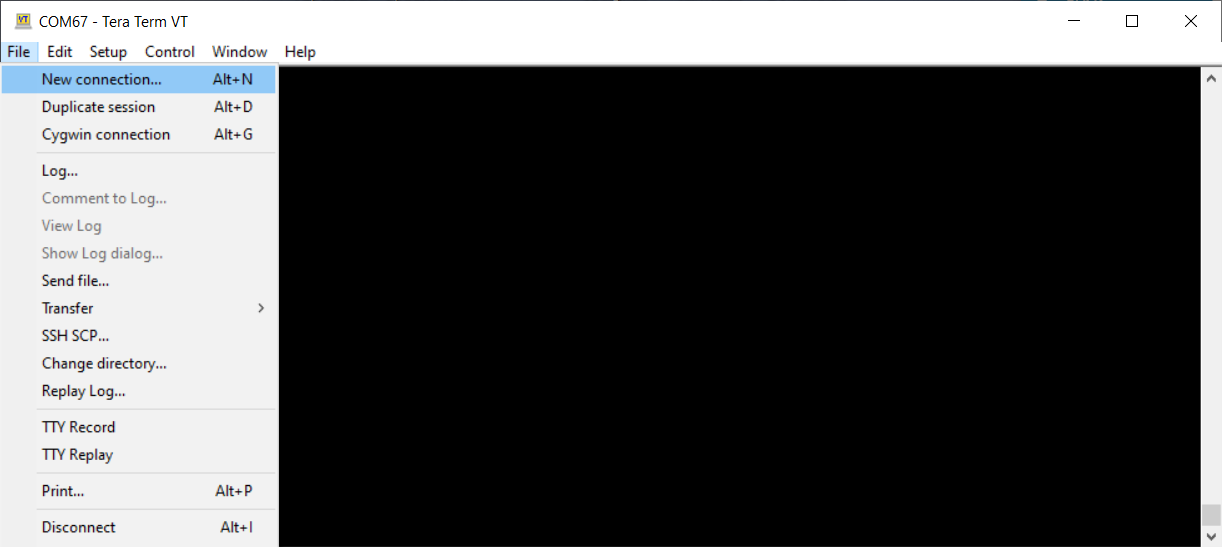
Step 1) Open TeraTerm (or your preferred terminal emulator: PuTTY,Hyperterminal,RealTerm)
Step 2) Select new connection
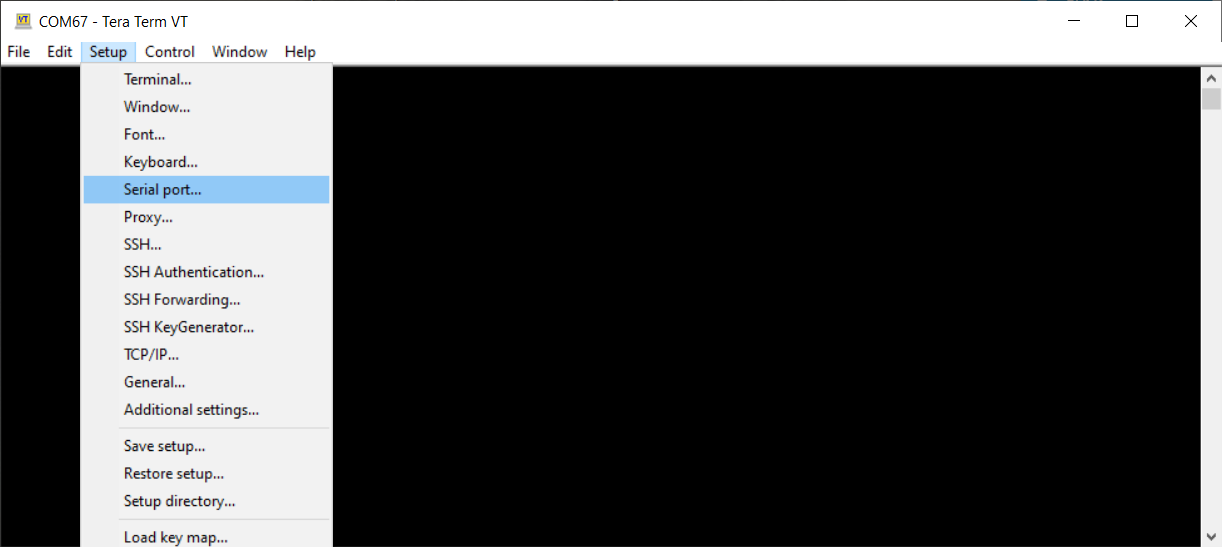
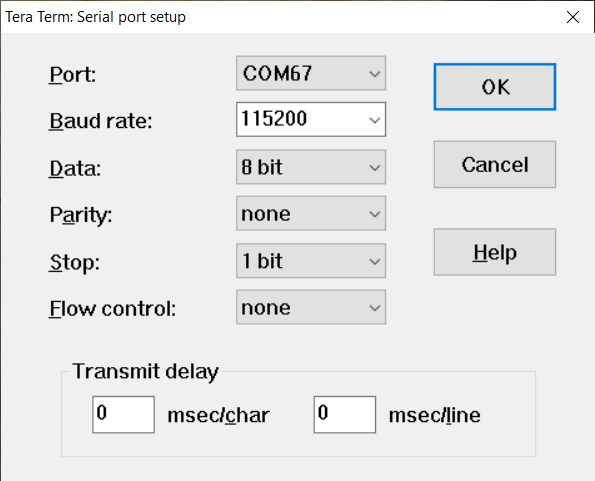
Step 3) Setup the COM port for your connection.
Step 4) Configure the port with the following settings (These settings are standard for all Siretta Industrial Modems):
- Bits per second: 115200
- Data bits: 8
- Parity: None
- Stop bits: 1
- Flow control: none
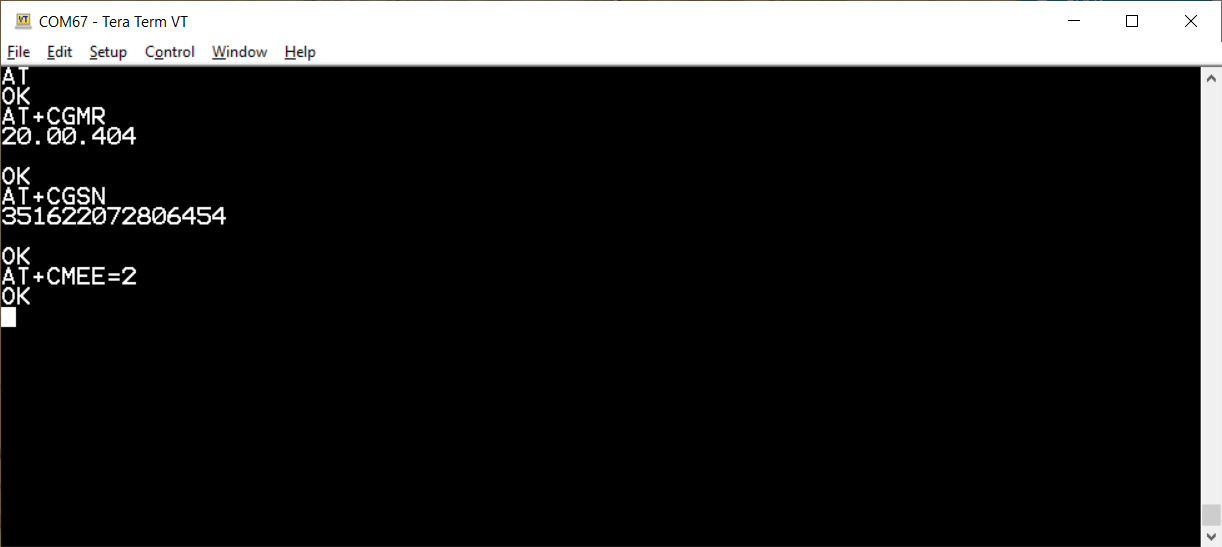
Step 5) Send AT commands to the unit. Send the initial ‘AT’ command to determine the serial communication with the modem is working correctly. If communication is successful. you will get an ‘OK’ response from the modem. You can then issue any other commands as required.
Commands to Check System is Working
Check Serial Port is Working
AT
//Receive following when successful:
OK
Set Verbose Error Reporting
AT+CMEE=2
//Receive following when successful:
OK
Commands for Basic Operation
Check PIN Registration
AT+CPIN?
//Receive following when successful:
+CPIN: READY
OK
//Receive following when SIM is not inserted:
+CME ERROR: SIM not inserted
//Receive following when SIM requires a PIN code:
+CME ERROR: SIM pin
Query Firmware Version
AT+CGMR
//Receive following when successful:
Firmware version (make a note of this)
NOTE: On newer firmware versions the modems support an extended firmware version command shown below
Query Extended Firmware Version
AT#SWPKGV
//Receive following when successful:
Extended firmware version (make a note of this)
Query IMEI Number
AT+CGSN
//Receive following when successful:
IMEI number (make a note of this)
Cellular Network Operation
Set network carrier registration to ‘ALL’
AT+COPS=0
//Receive following when successful:
OK
Set network carrier registration to specific carrier
AT+COPS=1,2,’netcode’
//Receive following when successful:
OK
NOTE:
The netcode is the carrier’s numerical network code which consists of a 3 digit country code and a 2 or 3 digit mobile network code. The format is <MCC><MNC> for example in the UK, Vodafone has a netcode of 23415 which is split into <234><15> where 234 is the mobile country code (MCC) and 15 is the mobile network code (MNC).
Set network technology type to ‘LTE’ only – for LTE enabled modems
AT+WS46=28
//Receive following when successful:
OK
NOTE:
When specifying 4G / LTE registration only, you force the modem to only be able to connect to the LTE network.
For LTE Cat M and LTE Cat NB IoT devices the unit can additionally be configured to connect to the LTE Cat M and LTE NB IoT networks (or each network independently).
Set network technology type to ‘both IoT networks’ – for LTE Cat M and LTE Cat NB IoT enabled modems
AT#WS46=2
//Receive following when successful:
OK
NOTE:
When specifying both network technologies, the modem will be able to connect to the LTE Cat M network or the LTE Cat NB IoT network.
Set network technology type to ‘Cat M’ only – for LTE Cat M enabled modems
AT#WS46=0
//Receive following when successful:
OK
NOTE:
When specifying LTE Cat M only, you force the modem to only be able to connect to the LTE Cat M network.
Set network technology type to ‘NB IoT’ only – for LTE Cat NB IoT modems
AT#WS46=1
//Receive following when successful:
OK
NOTE:
When specifying LTE NB IoT only, you force the modem to only be able to connect to the LTE NB IoT network.
Set network technology type to ‘UMTS’ only – for UMTS enabled modems
AT+WS46=22
//Receive following when successful:
OK
NOTE:
When specifying 3G / UMTS registration only, you force the modem to only be able to connect to the UMTS network.
UMTS is not available in some regions and this may cause the modem to be unable to communicate on the available networks.
Set network technology type to ‘GSM’ only – for GSM enabled modems
AT+WS46=12
//Receive following when successful:
OK
NOTE:
When specifying 2G / GSM registration only, you force the modem to only be able to connect to the GSM network.
GSM is not available in some regions and this may cause the modem to be unable to communicate on the available networks.
Set network technology type to all – for LTE enabled modems (not LTE Cat M and LTE Cat NB IoT modems)
AT+WS46=25
//Receive following when successful:
OK
NOTE:
This setting will allow the modem to connect to any available network technology in the area and provides the most robust connectivity solution.
Set network technology type to all – for LTE Cat M and LTE Cat NB IoT enabled modems
AT+WS46=30
//Receive following when successful:
OK
NOTE:
This setting will allow the modem to connect to any available network technology in the area and provides the most robust connectivity solution when used with AT#WS46=2 for both LTE Cat M and LTE Cat NB IoT networks.
Check network registration for LTE Cat M and LTE Cat NB IoT connected modems
AT+CEREG?
//Receive following when registered to a local network:
+CEREG: 0,1
//Receive following when registered to a roaming network:
+CEREG: 0,5
//Receive following when not registered to a network:
+CEREG: 0,0
//Receive following when searching for a network:
+CEREG: 0,2
//Receive following when registration is denied:
+CEREG: 0,3
Check network registration for LTE/UMTS/GSM connected modems
AT+CREG?
//Receive following when registered to a local network:
+CREG: 0,1
//Receive following when registered to a roaming network:
+CREG: 0,5
//Receive following when not registered to a network:
+CREG: 0,0
//Receive following when searching for a network:
+CREG: 0,2
//Receive following when registration is denied:
+CREG: 0,3
NOTE:
When experiencing registration problems, check the following:
- Antenna is connected and screwed in tightly to unit
- SIM is valid and has credit / active
- SIM is setup for 4G LTE service
- SIM is SMS enabled
- There is signal available for the cellular network in use
- Ensure more than 15 seconds has elapsed since power up
Check network signal strength
AT+CSQ
//Receive signal value >9 when successful:
+CSQ: 23,1
//Receive signal value =99 when there is no signal:
+CSQ: 99,1
//Receive signal value less than 9 when there are network connectivity issues:
+CSQ: 3,1
NOTE:
- When experiencing bad network signal strength (less than 9), check the following:
- Antenna is suitable for network in use and is tightly screwed to unit
- There is good signal available for the cellular network in the area
- Move the antenna near a window or preferably outside
- Move the antenna to an elevated position (> 3M high)
- Use a high gain antenna
- Ensure short cable length (less than 3M) for cable connecting antenna to modem
GPRS Network Operation
Check GPRS context availability
AT+CGATT?
//Receive following when successful:
+CGATT: 1
OK
//Receive following when content is not available or not enabled:
+CGATT: 0
OK
Set GPRS APN for your network
AT+CGDCONT=1,”IP”,”APN Name”
//Receive following when successful:
OK
NOTE:
To configure the APN name correctly, follow these steps :
- Navigate to the following link: https://www.siretta.com/apn
- Select the country you are in (If your country is not listed please contact Siretta)
- Select the network from the list (If your network is not listed please contact Siretta)
- Insert the APN name from the table in to the “APN Name” field in the ‘AT+CGDCONT’ command
Connect to GPRS context
AT#SGACT=1,1,”APN Username”,”APN Password”
//Receive following when successful (Where x.x.x.x is your assigned IP address):
#SGACT: x.x.x.x
OK
//Receive following when the APN Name / APN Username / APN Password is incorrect:
ERROR
NOTE:
To configure the APN username and password correctly, follow these steps:
- Navigate to the following link: https://www.siretta.com/apn
- Select the country you are in (If your country is not listed please contact Siretta)
- Select the network from the list (If your network is not listed please contact Siretta)
- Insert the APN username from the table in to the “APN Username” field in the ‘AT#SGACT’ command
- Insert the APN password from the table in to the “APN Password” field in the ‘AT#SGACT’ command
TCP Socket Connection
Setup TCP socket connection parameters
AT#SCFG=1,1,300,90,600,50
//Receive following when successful:
OK
NOTE:
Use the following standard parameters:
- 300 bytes packet size
- 90 second no activity timeout
- 600 second connection timeout
- 50 millisecond packet timeout
Connect TCP socket to server IP address
AT#SD=1,0,xxxx,”y.y.y.y”
//Receive following when successful (Serial port connected directly to server socket):
CONNECT
//Receive following when connection is dropped (Serial port no longer connected to server socket):
NO CARRIER
NOTE:
When connecting to a server socket the following should be considered:
- The IP address “y.y.y.y” of the server should be fixed and capable of accepting an incoming data socket connection
- The server port “xxxx” should be configured and capable of accepting an incoming data socket connection
