
Introduction
This application note is produced for customers who may wish to develop their own application to run on Siretta Modems using AppZone C.
What is AppZone C?
AppZone C is a software layer that provides a set of APIs to access the modem. AppZone C allows the user to create M2M applications that run on the module CPU; eliminating the need to use an external application processor.
All Siretta modems support APPZone C, except Siretta SL500 which already runs an application to act as an RS232 serial gateway. https://www.siretta.com/products/industrial-modems/lte-cat-1-mobile-network/low-power-lte-cat-1-rs232-gateway/
This guide covers different aspects of programming Siretta Modems, including how to Open a new Project, build the project, load it and run the application.
The sample application used “General_Info”.
“General_Info” gives general modem information such as, IMEI, FW version etc. It also gives information on registration and debug prints on the main UART.
Requirements
- Window PC with Java Version 8 or above (64-bit) (Java can be installed from the following link Java | Oracle)
- Window PC with Java (TM) SE Development Kit Version 20 or above (64) , JDK can be downloaded from the following link Download the Microsoft Build of OpenJDK | Microsoft Docs
- Window PC with Code Editor application such as UtraEdit, Sublime or NotePad++ (NotePad++ can be downloaded from Download Notepad++ v8.5.2 | Notepad++ (notepad-plus-plus.org)
- Window PC with Tera Term Version 4.96 (Tera Term can be downloaded from the following link – Teraterm Link).
- IoT AppZone IDE V5 (IoT AppZone IDE V5 can be downloaded from the following link IoT App Zone Developer Resources – Telit )
- Window PC with A Telit AT Controller ( Telit AT Controller can be downloaded from the following link IoT App Zone Developer Resources – Telit )
- Siretta Part ZETA-NLP-LTE1 (EU) (A Low Power Modem with RS232 and USB serial ports) was used for this application note. Product link: Ultra Low Power LTE Cat 1 (EU) – Siretta – Enabling Industrial IoT
- Initial Modem Setup Guide Application Note: https://www.siretta.com/2019/08/basic-modem-functions/
- Enhanced Modem Functions – https://www.siretta.com/2023/02/enhanced-modem-functions/
- Install all the above applications on your PC.
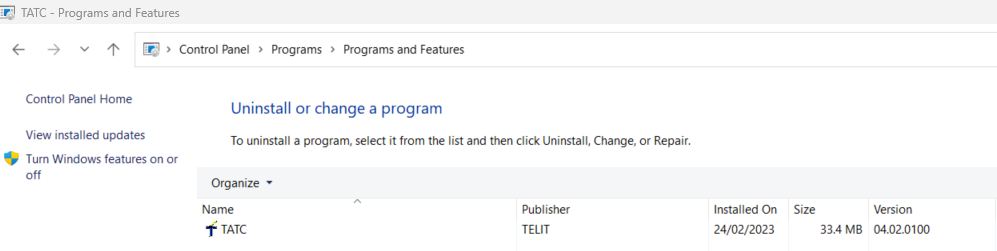
- Open the PC control panel to check all the applications have been installed.
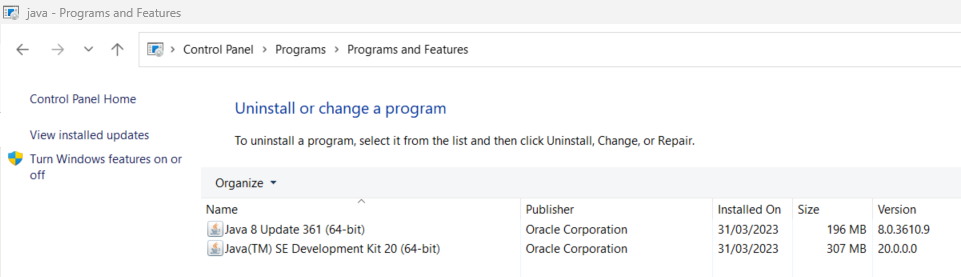
- Confirm Java and Java (TM) SE Development kit are installed (See below).
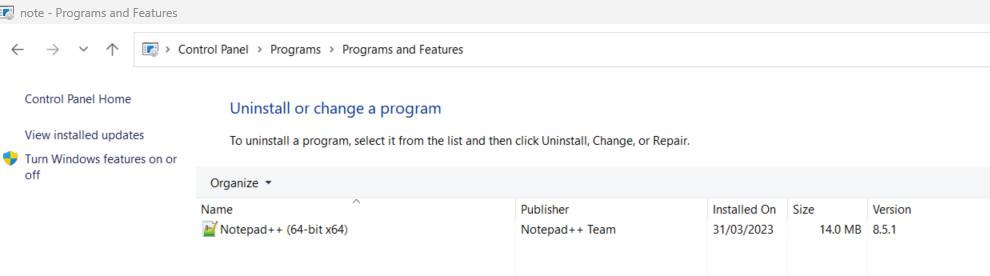
4. Confirm Notepad++ (64 bit) is installed or code editor of your choice ( See below).
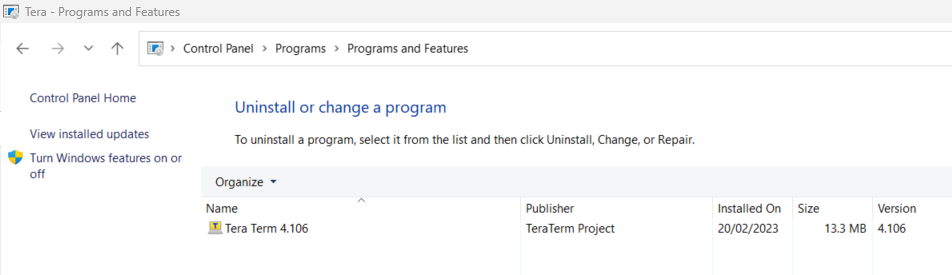
5. Confirm Tera Term Version 4.96 or above is installed (See below).
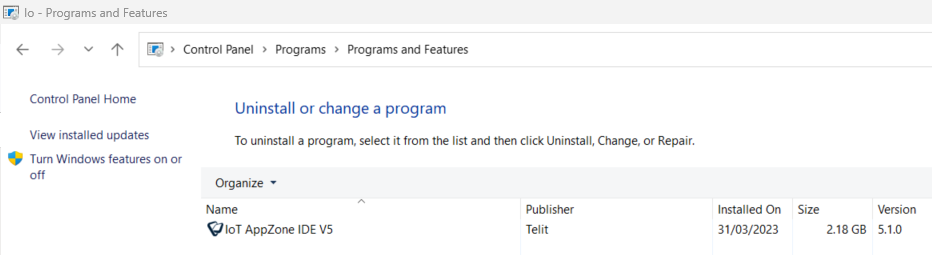
6. Confirm IoT AppZone IDE V5 or above is installed (See below).
7. Confirm Telit AT Controller is installed (See below).
Note: Now your PC have all the required applications for programming Siretta Modem.
8. Follow pages 1 to 5 of the Initial Modem Setup Guide Application Note.
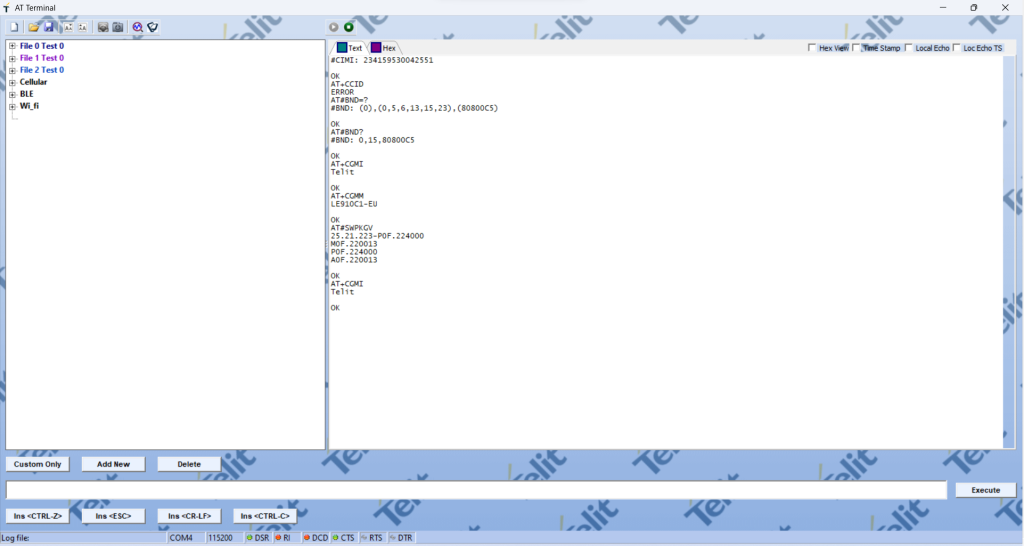
9. Issue the AT commands shown in points 10-13 below to gather more information about the Siretta modem.
10. Issue ATI4 – To obtain: Cellular Module Model.
11. Issue AT+CGSN – To obtain: Cellular Module IMEI number.
12. Issue AT+CGMI – To obtain: Manufacturer of the cellular Module.
13. Issue AT#SWPKGV – To obtain: Software Package Version inside the Module.
14. You will receive the conformation as shown below.
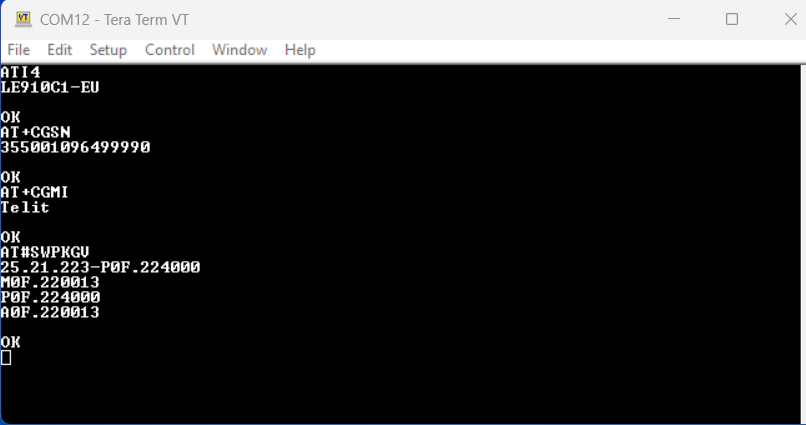
Note:The modem information above is very important, as it allows the user to choose and use the right tool chain for compiling an application.
15. Disconnect the modem from Teraterm.
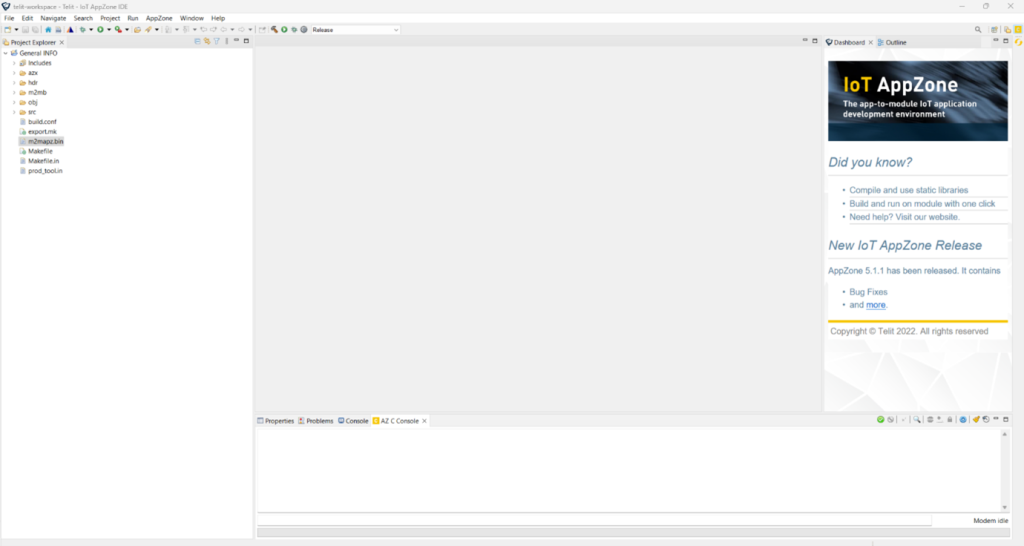
16. Open Telit- IoT AppZone IDE V5 by double clicking its desktop icon or through start >>program>> Telit- IoT AppZone IDE V5. You will be presented with a screenshot below.
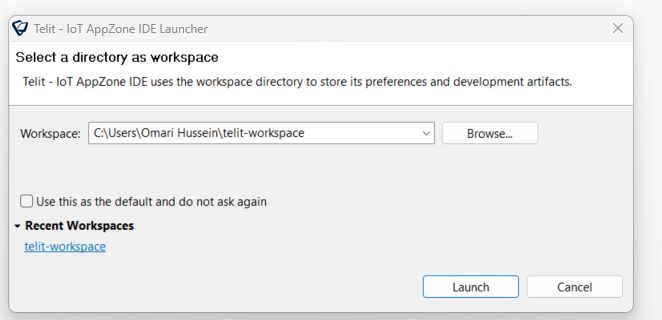
17. Leave a default Workspace “telit- workspace”.
18. Click “Launch” tab.
19. Wait for workspace to load.
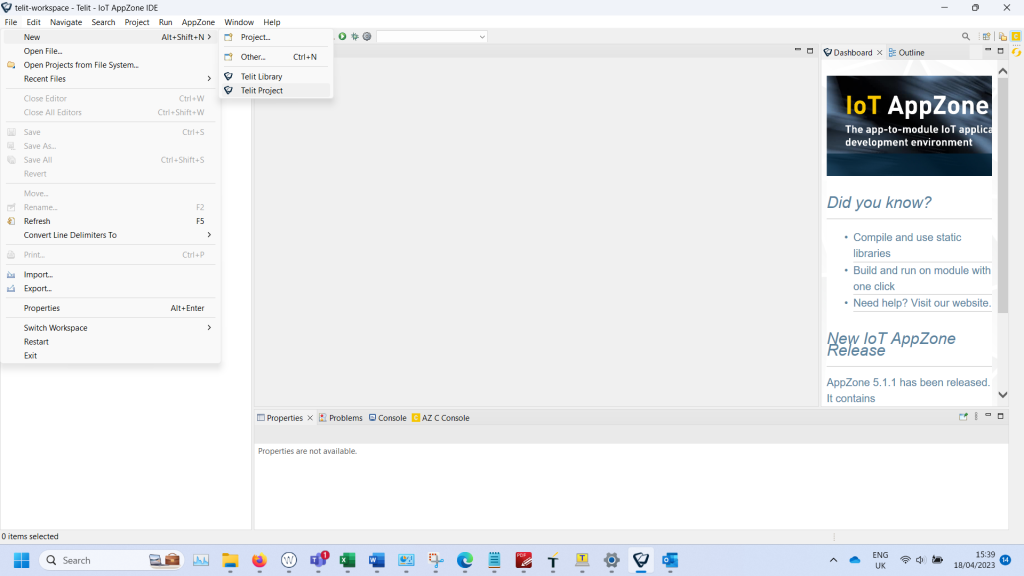
20. You will be presented with a screenshot as below.

21. Click “File”
22. Select “New “ from dropdown menu.
23. Select “Telit Project”
24. You will receive the screenshot below.
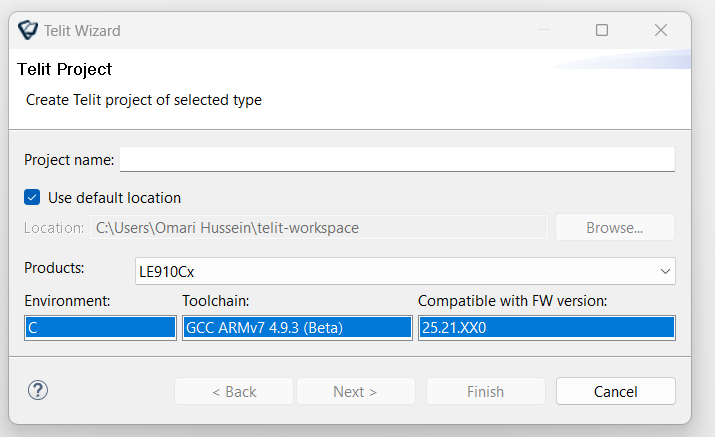
25. Type the Project Name of your choice ( For this Guide “General_INFO” was used).
26. Check “Use default location box “ if not checked.
27. Choose the Product you wish to program from the dropdowm menu below.
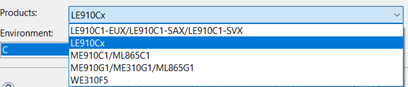
28. For this guide the Siretta Modem with Telit “Module LE910C1-EU” was used ( See step 14 above).
29. Select “LE910Cx “ from the list.
Note: Information about Environment, Toolchain and firmware are auto polulated when product to be programmed “ LE910Cx” is selected.
30. Confirm that a firmware returned in step 14 above is compatible with the format in step 24 above , otherwise the user may have to upgrade the device to the latest version using a SPARKTool which can be dowloaded from the following link SirettaSPARK Tool.
31. Confirm that your page looks like that shown below:
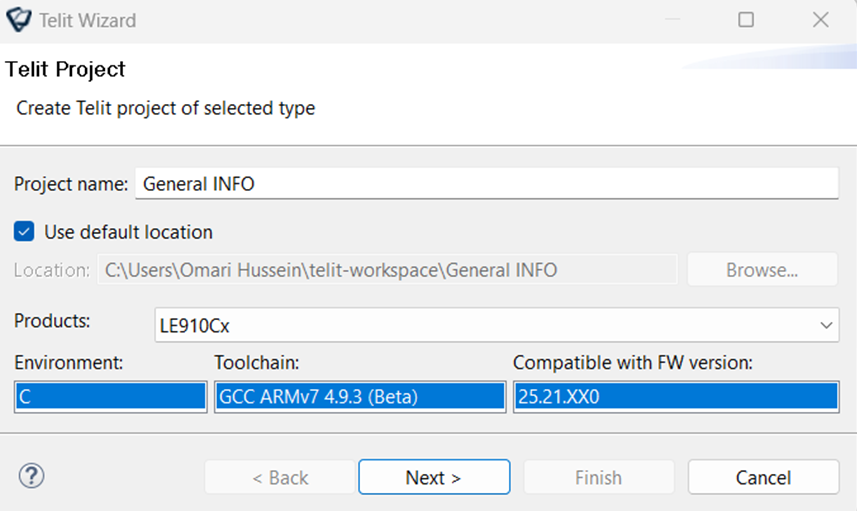
32. Click “Next”
33. Screenshot below will appear.
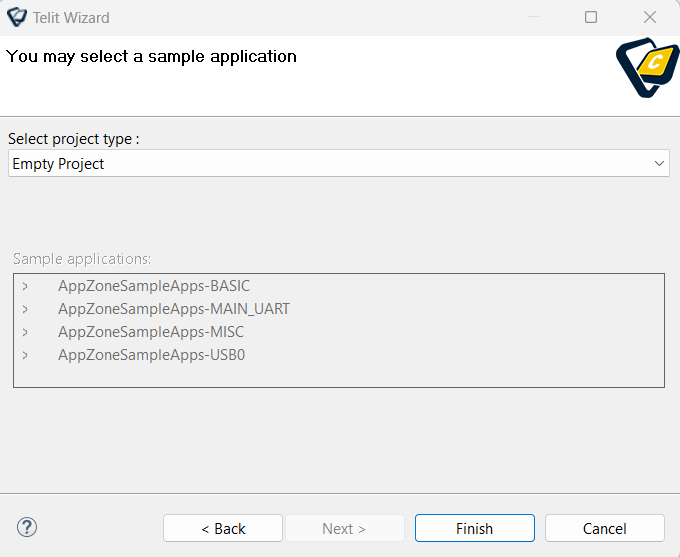
34. From the dropdown menu, Select “Example template “
35. Select “AppZoneSampleApps- MAIN_UART”in Sample applications.

36. In “Sample applications”, double click “AppZoneSampleApps- MAIN_UART” to expand the selection
37. From here, select “General_INFO”
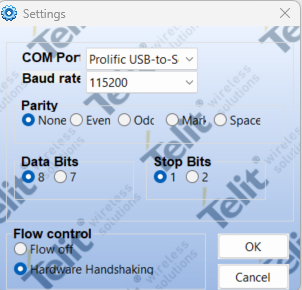
38. You will be presented with a screenshot like the one below.
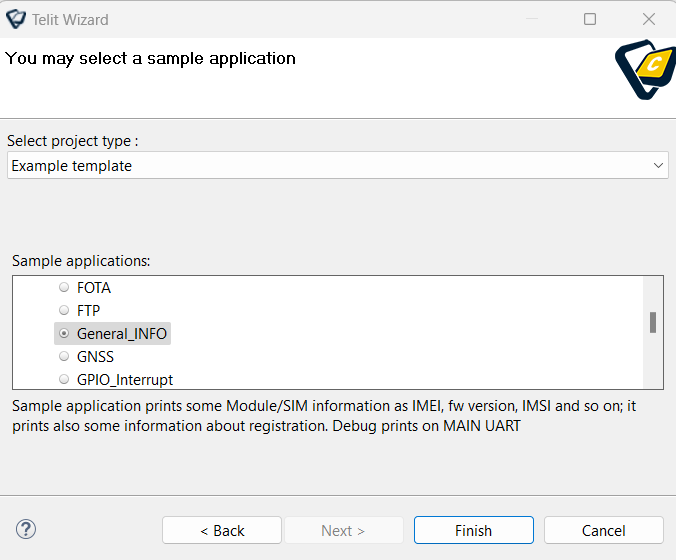
39. Click “Finish”
40. You will be presented with a progess bar as seen below.
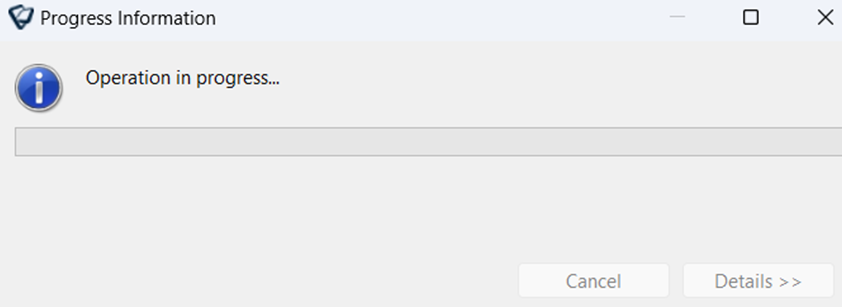
41. Wait for the operation to complete.
42. Once the operation is completed you will be presented with a screenshot as below.
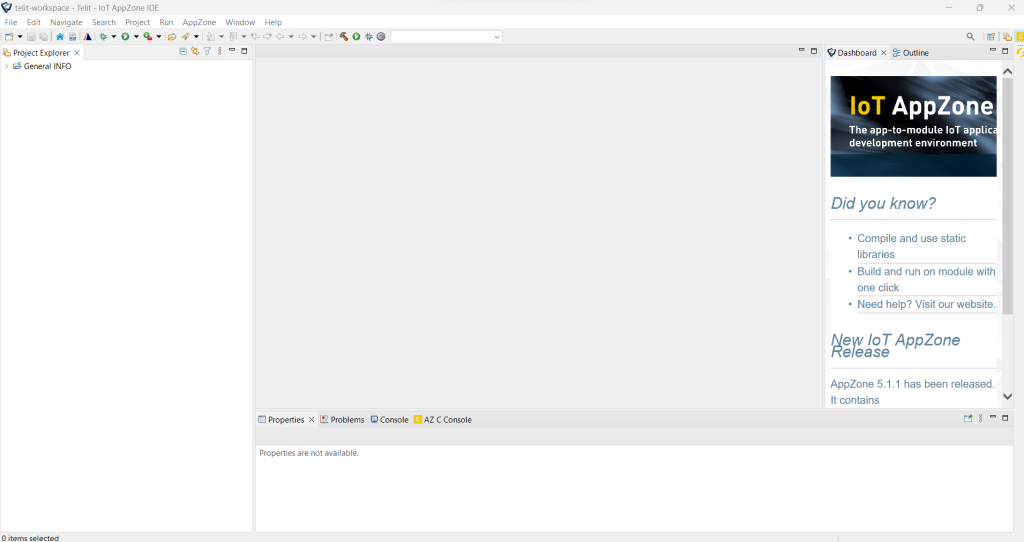
43. Click “General_INFO” to select.
44. Expand “General_INFO” by clicking “>”
45. You will be presented with a screenshot below.

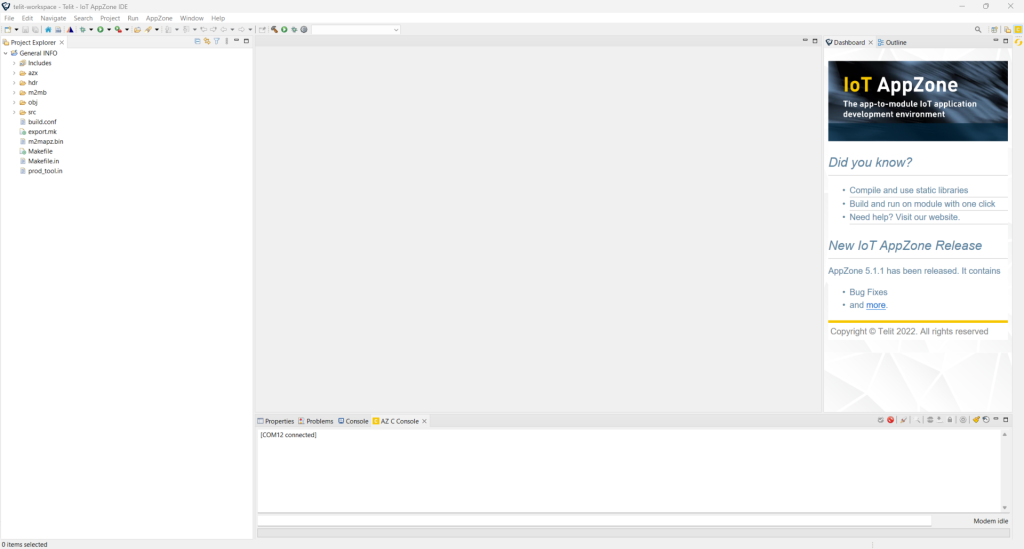
46. Expand “src” folder you will be presented with “M2M-main.c”
![]()
Note: M2MB-main.c is the main source code file which can be opened using text editor application to enter configuration details if required.
47. Collapse “src” folder.
48. Collapse “General_INFO”
49. Click to select “General_INFO”
50. Click Project
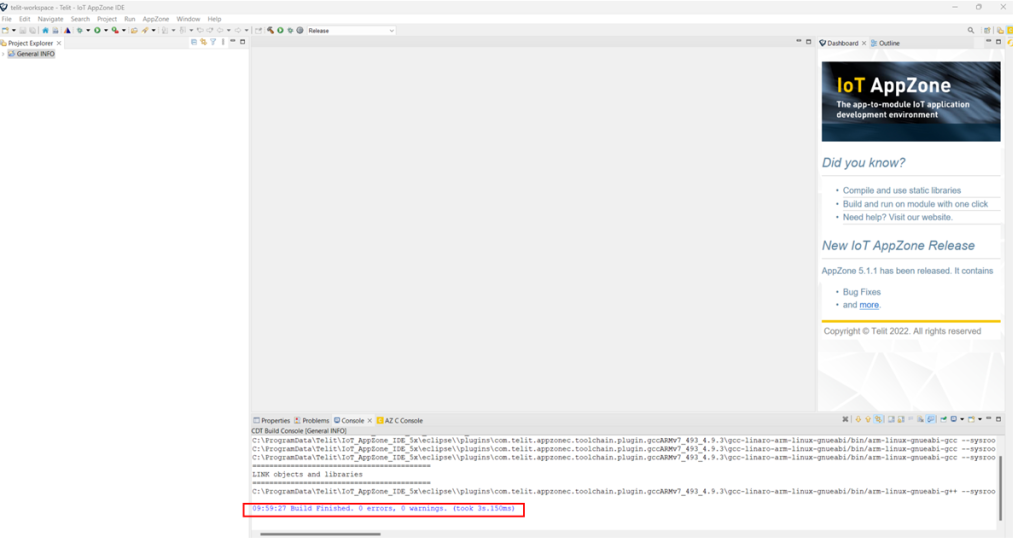
51. Select “Build All” from the project drop down menu.( See screenshot below).
52. If the build is successful, you will be presented with a screenshot as shown below without any errors or warnings.
53. Expand “General_INFO”
54. You will see a newly generated binary file shiwn as “m2mapz.bin”
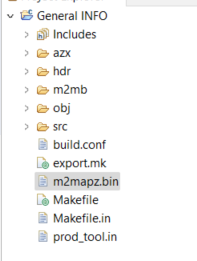
Note: binary file “m2mapz.bin” is the only file to be loaded to the Siretta Modem.
55. Click AZ C Console tab
56. You will be presented with a screenshot below.
57. Click Setting tab in red square above.
58. You will be presented with a screenshot like that shown below.
59. Select the COM Port where the Siretta Modem is connected, (for this guide COM12 Prolific USB-to-Serial Comm Port).
60. Select the default Baud rate of 115200
61. Parity: None
62. Data Bits: 8
63. Stop Bits: 1
64. Flow Control: Hardware Handshaking
65. Click: OK
66. Click: Connect com port icon “ ” to connect the Siretta Modem with AZC Console.
67. You will receive the screenshot shown below when a connection is succesfully made.
68. Drag the binary file “m2mapz.bin” and drop it to the space below:

69. You will receive the screenshot shown below when the application is successfully loaded to the Siretta Modem.
70. Start application by clicking the launch button
71. When successful you will receive a prompt that the application has “Started” then the application will run as shown below.
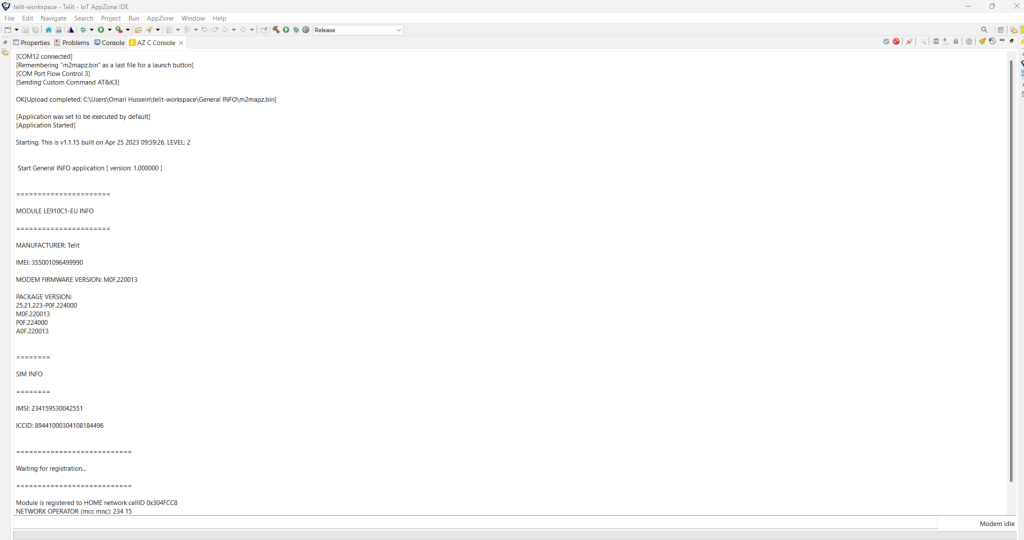
Note: You have successfully created, built , loaded and run an application to the Siretta Modem that returns Module information, including SIM information, registration information, cell ID, MCC ,MNC, and RSSI as seen above.
The Siretta modem will display the above information at each power up on its serial port, without the need to use any AT command. You may follow a similar procedure to that shown above to create different projects and run them.
Before you load a new binary to the modem you have to delete the previous one by following the procedure below.
72. Connect the Siretta Modem to the PC using the mini-USB to USB cable provided.
73. Open Telit AT Controller by double clicking desktop icon  or through start>>Program>> Telit AT Controller
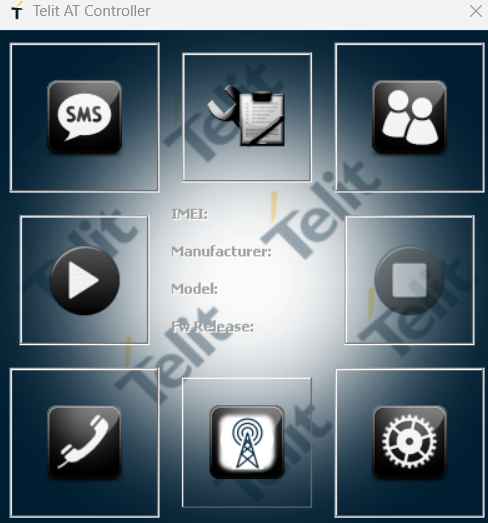
74. You will be presented with a screenshot like that shown below.
75. Click the “Settings” option above to see the screenshot below.
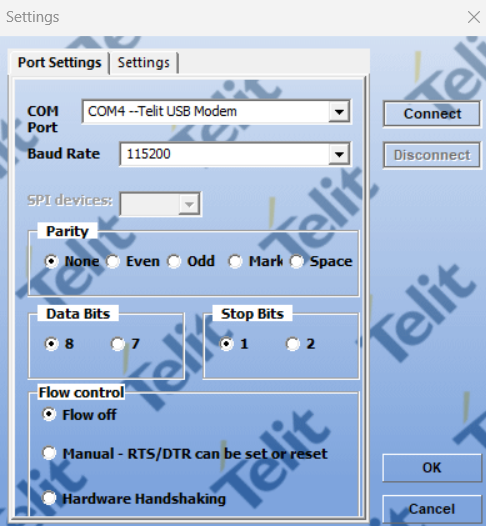
76. Confirm that the COM Port is directed to the Telit USB Modem. (For this Guide COM4 was used).
Note: For the Telit USB Modem to appear in a PC device manager, a PC has to be installed with USB driver and the Siretta Modem has to be connected to a PC using a mini-USB to USB cable. A USB driver can be downloaded from the following link: Software Library – Siretta – Enabling Industrial IoT – Software Updates
77. Leave the default settings Baud Rate at 115200, Parity None, Data Bits 8, Stop Bits 1 and Flow control set to off as seen above.
78. Click Connect.
79. You’ll receive the screen below when connection is successful.

80. Click “AT Terminal” icon above.
81. You will be presented with the screenshot below.
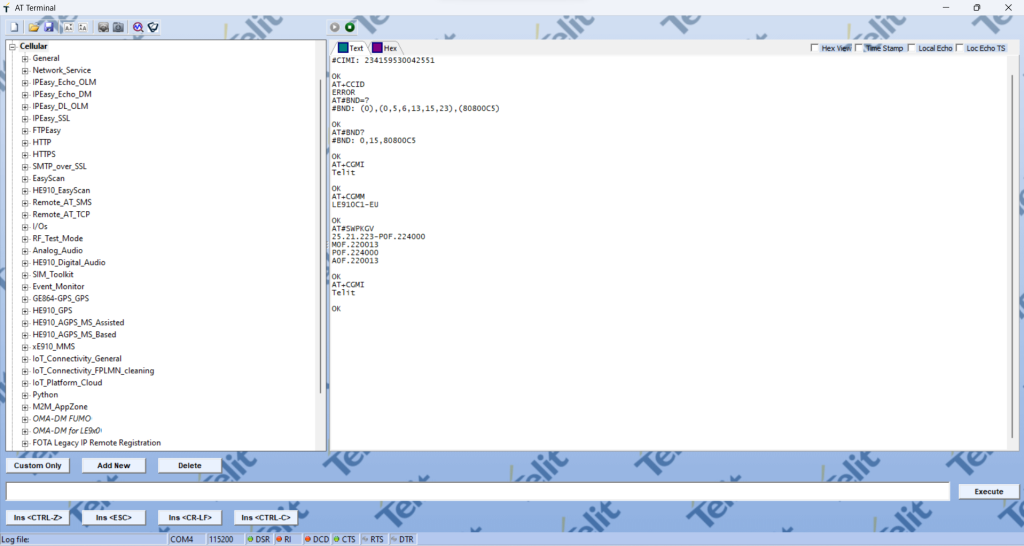
82. Expand “Cellular “ where you will then be presented with the option below.
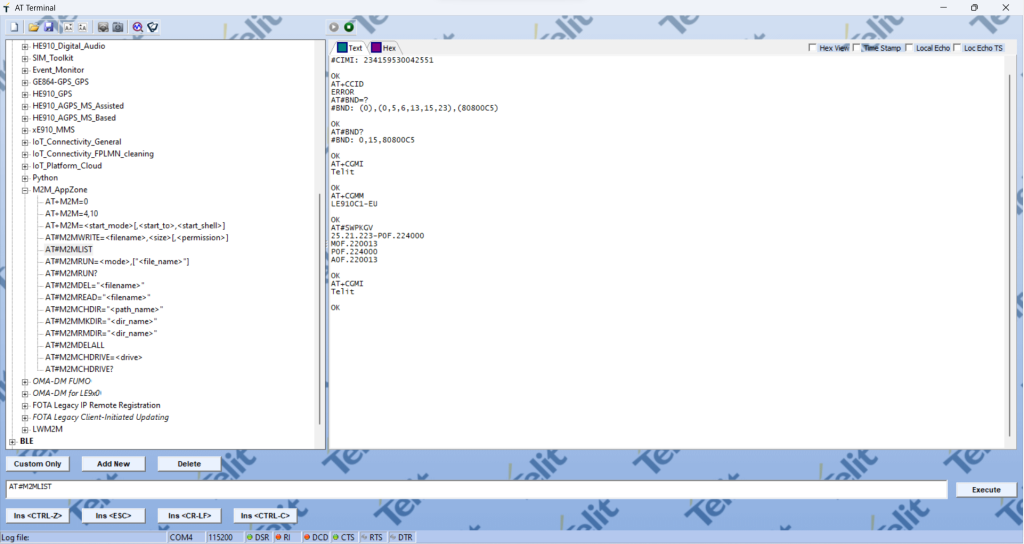
83. Expand M2M_AppZone where you will be presented with the option below.

84. Click AT#M2MLIST
85. Click Execute
86. You will be presented with the screenshot below.
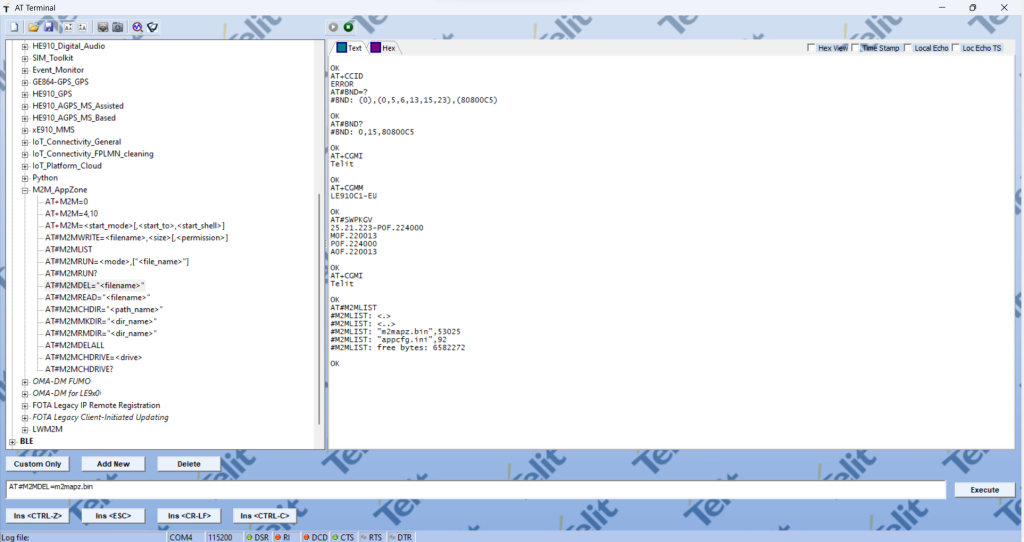
87. Click AT#M2MDEL = m2mapz.bin
88. Receive OK when Successful
89. You have successfully deleted the application “m2mapz.bin” from the Siretta Modem.
90. Now the Siretta Modem can be programmed with a different application.
Note: If user has their own application in binary file and wishes to load it to the Siretta Modem, then, the user can use AT Controller with the following AT commands AT#M2MWRITE=<filename>,<size>,<permission> then issue AT#M2MRUN=<mode>,”<file_name>”.
Siretta have tested all the AppZone C examples using this guide, so if you face any issues please contact [email protected].
